Week 3: Computer-Controlled Cutting
Assignment:
- Group assignment: make laser cutter test part(s), varying cutting settings and slot dimensions.
- Individual assignment: design, make, and document a parametric press-fit construction kit, accounting for the laser cutter kerf, which can be assembled in multiple ways.Cut something on the vinylcutter.
For this week we have to make both individual and group assignments in the laser cutter and vinyl cutter.
Laser cutters are used to cut and engrave a wide variety of materials such as cardboard, MDF, plywook, acrylic, fabric, etc., the power and speed vary among material kind and thikness.
This time we try 3mm cardboar to make the group and individual assignments.
Machine:
Software:
PRESS-FIT CONSTRUCTION KIT
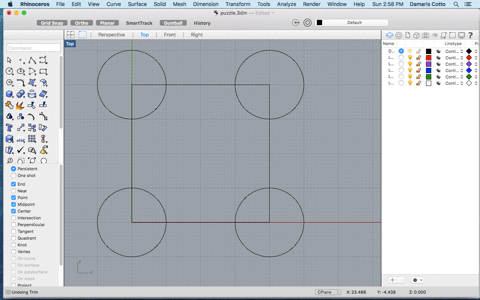
For the individual assignment we had to design, make and document a press-fit construction kit, so I start making the piece in Rhinoceros for Mac.
Once I finished to design the press-fit piece, I export the the file to PDF to be able to open it in CorelDraw and send it to cut.
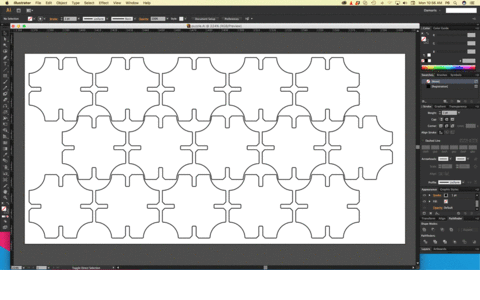
For laser cutting I used a Trotec Speedy 100, I opened the PDF file in CorelDraw and changed the color outlines to RGB Red (R 255, G 0, B 0) and the thickness must be“thin” or 0.011 pt.
I sent the layout via printer driver to the laser machine and define the size and material to use, in my case I used 3mm cardboard. The software controlling the laser is JobControl. The settings to cut were Power: 70 and Speed: 3.0 with 5000 Hz, I just needed 1 pass and air assistant Off to avoid the risk of have burn edges.
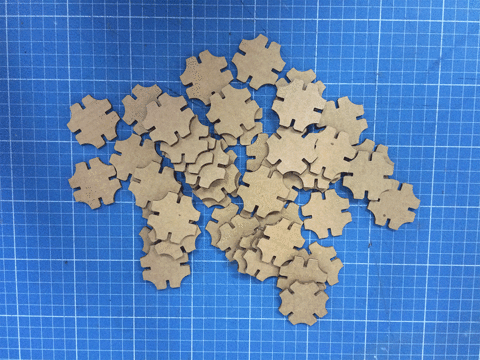
Once I had all the pieces cut, next step was assembly and construct, the size of each cardboard piece is 4 x 4 cm and the cardboard thickness is 3 mm. Here is the result.
VINYL CUTTER
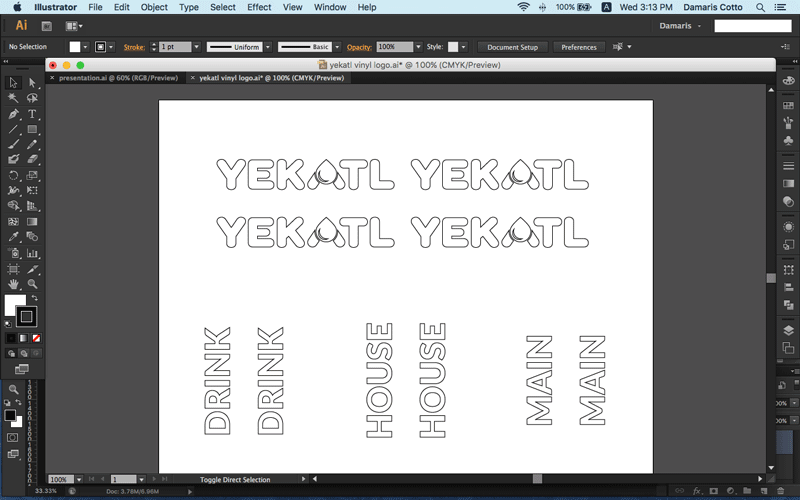
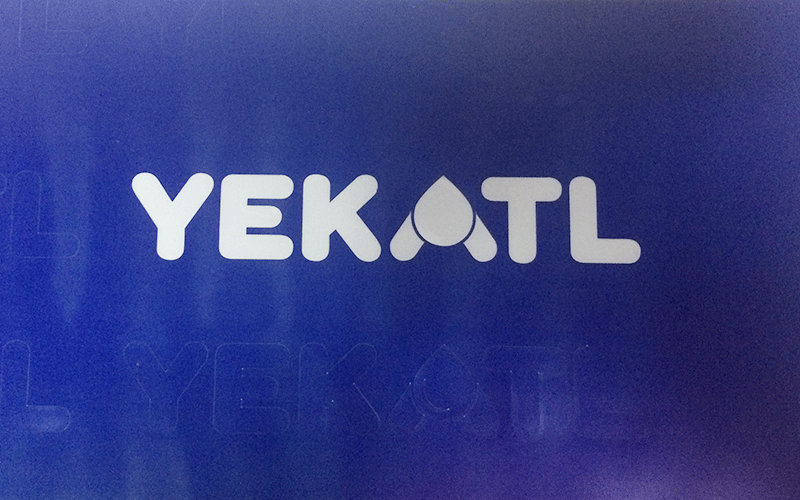
For the Week 2 assignment, I design my final project logo, so I decided to cut it in blue vinyl to use it in the project.
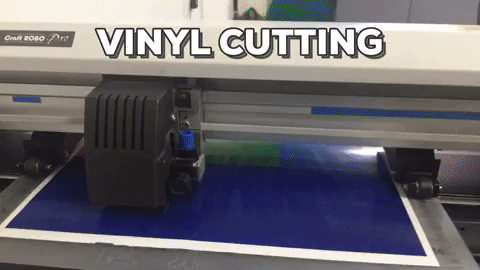
I designed the logo in Illustrator CS6, so I open the file and I send it to cut to the Graphtec Robo PRO via printer driver.
The machine starts to cut immediately and this is the final result:
PARAMETRIC DESIGN AND LASER CUT
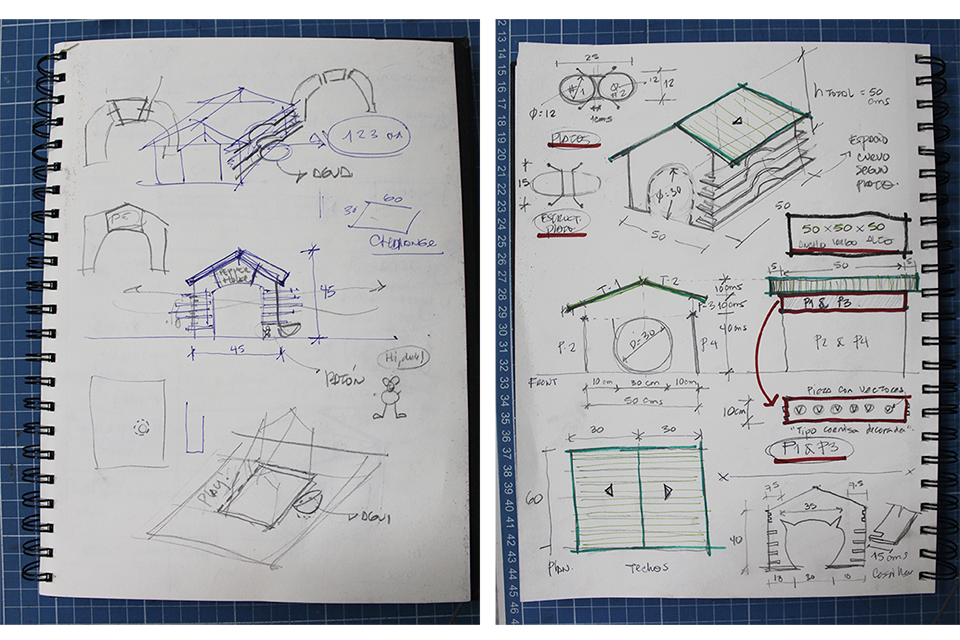
As suggested in class, for this week group assignment we had to make a parametric design and laser cutting of a furniture using 3 mm cardboard. Our assignment is a little house for the Fab Lab baby cat called Pepper Box.
CAD
First we made 2D sketches and defined measures of the house
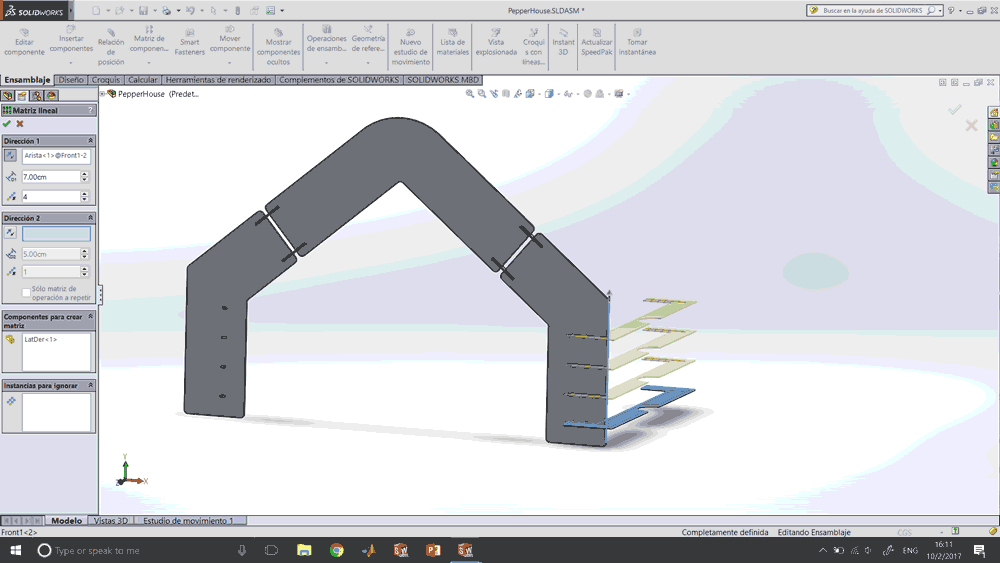
Taking this parameters and concepts we started modelling in SolidWorks. At the beginning we made several mistakes, but thanks to the parametric software we could fix them easily. We needed to make some of "trial and error" to adjust the geometry of the house.
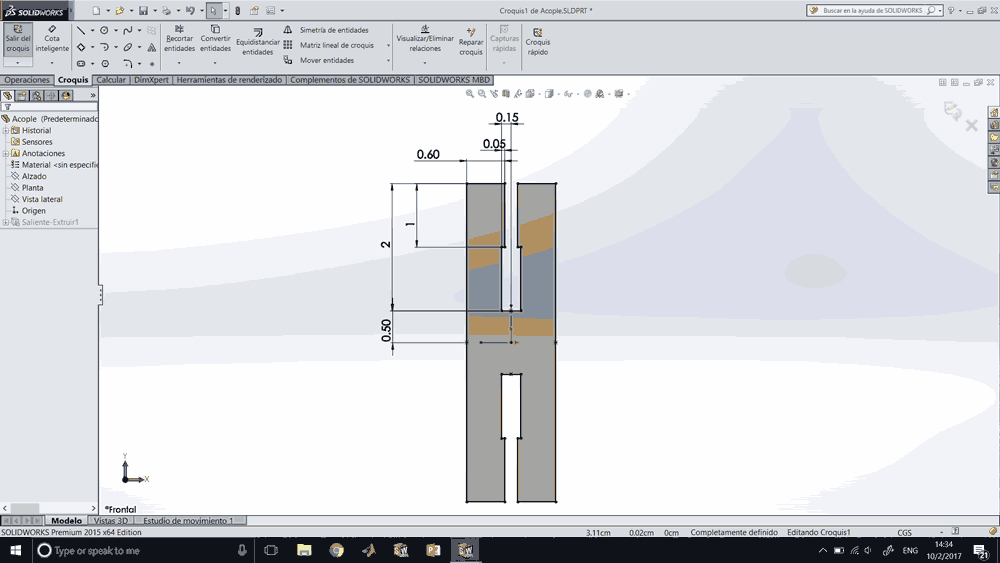
We also needed to make some test of the assembly process.
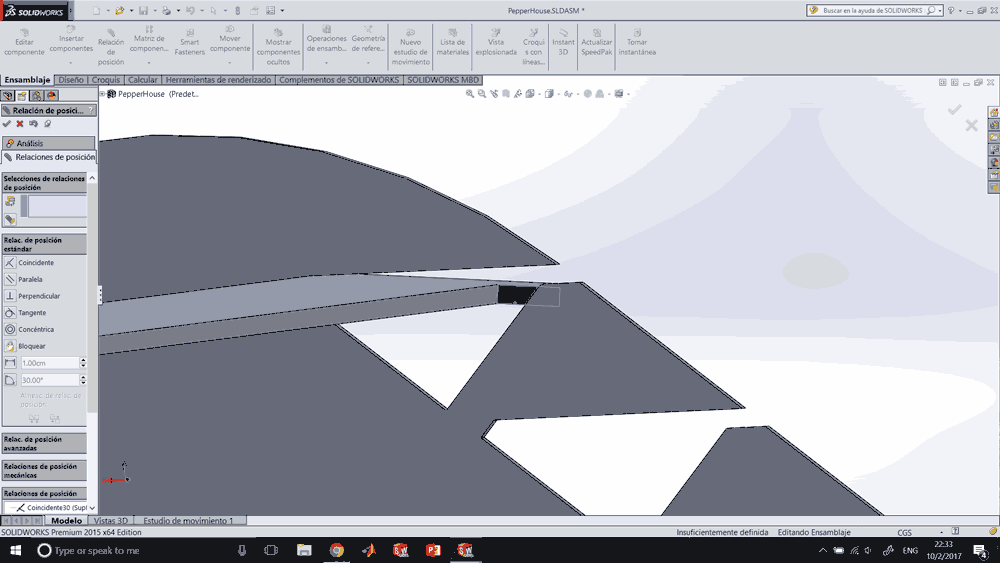
Modelling and assembly
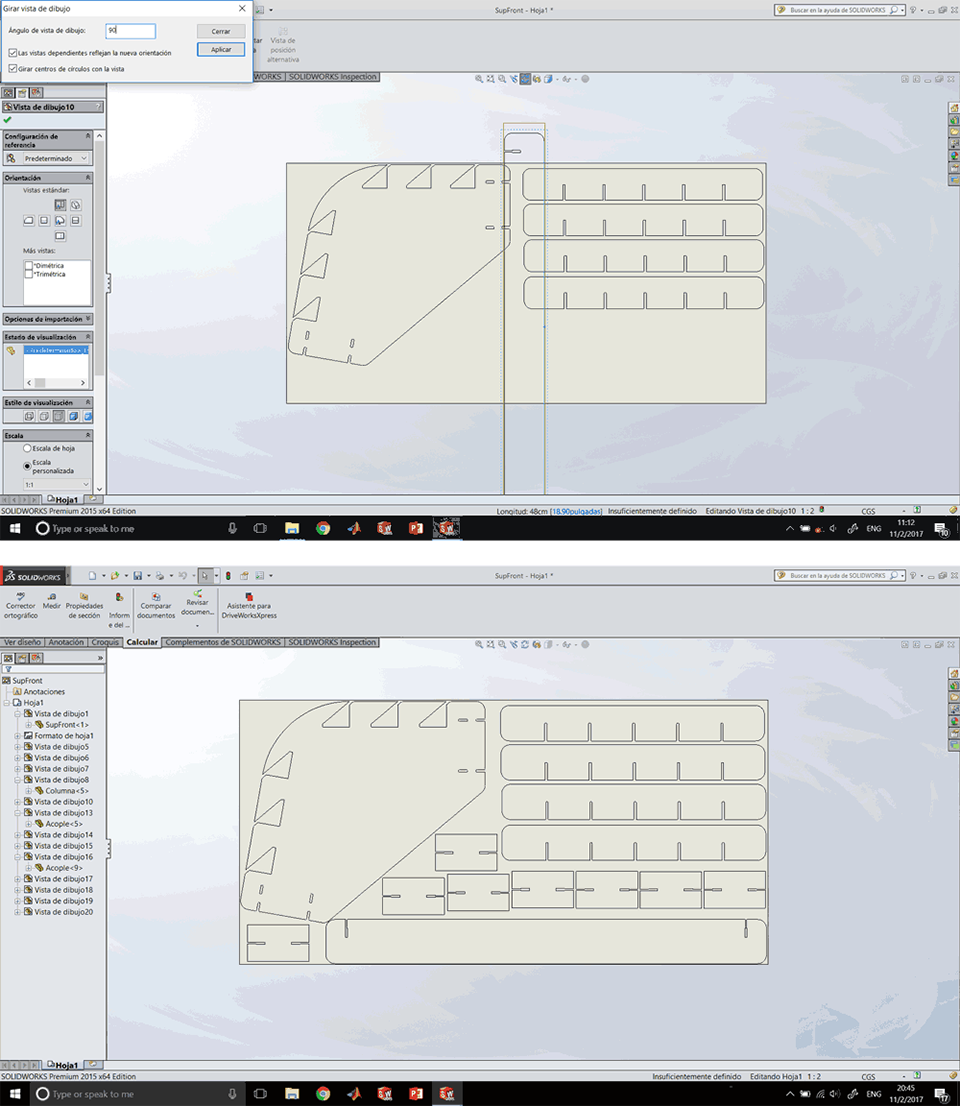
And the nesting.
LASER CUTTING
Once we had all the pieces nested in 600x300 mm sized pages, we start to cut all in 3mm cardboard sheets. First step is turn the power on and wait until the chime indicates the machine is ready, for cutting purposes we used the aluminium honeycomb inside the machine and proceed to calibrate the material using the tool for this pourpose.
Next step is open the PDF files in CorelDraw, and change the color outlines to RGB red (R 255, G 0, B 0) and the thickness to “thin” or 0.011 pt, then we just had to send the layouts to Job Control via printer driver.
To cut 3mm cardboard we try several power and speed amounts and the one which worked the best was Power: 70.0 and Speed: 3.0 using 5000 Hz, 1 pass and the air assistant off because if we let it on, the cutting edges were burned. To assembly Pepper Box house we used 10 cardboard sheets.
ASSEMBLY
Below you will enjoy a video documenting the process of assembling Pepper's house.
As you can see, the protagonist of the video is Pepper!
So we invite you to spend a good time and know a little more about this nice exercise, where we demonstrate that digital manufacturing based on parametric design and laser cutting, can also contribute to do almost anything in our house or office; Even a home for our pet!
Assigment 03-Assembly from Fablab Sv on Vimeo.
This assigment was sponsored by: